Collect and review documents
By Compliance OS on September 29, 2026
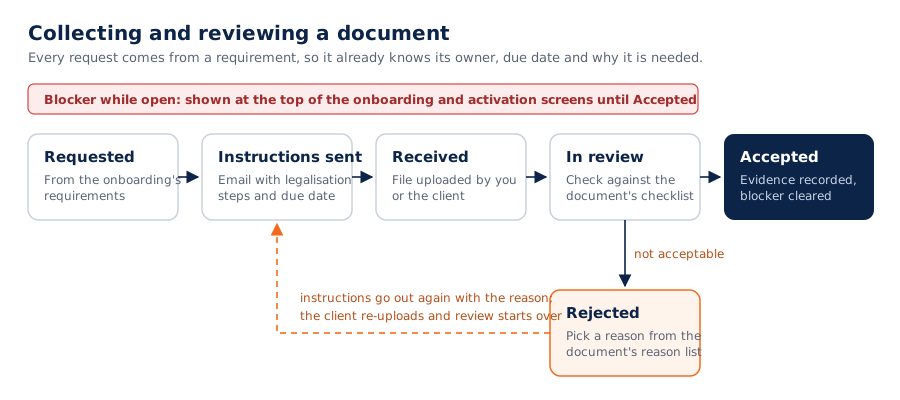
IntermediateEvery document request comes from a requirement, so it already knows who owes it, when it's due and why.
1. Open document collection
From the wizard, click Open documents. Use the tiles to filter by status. A Blocker tag marks documents that stop activation.
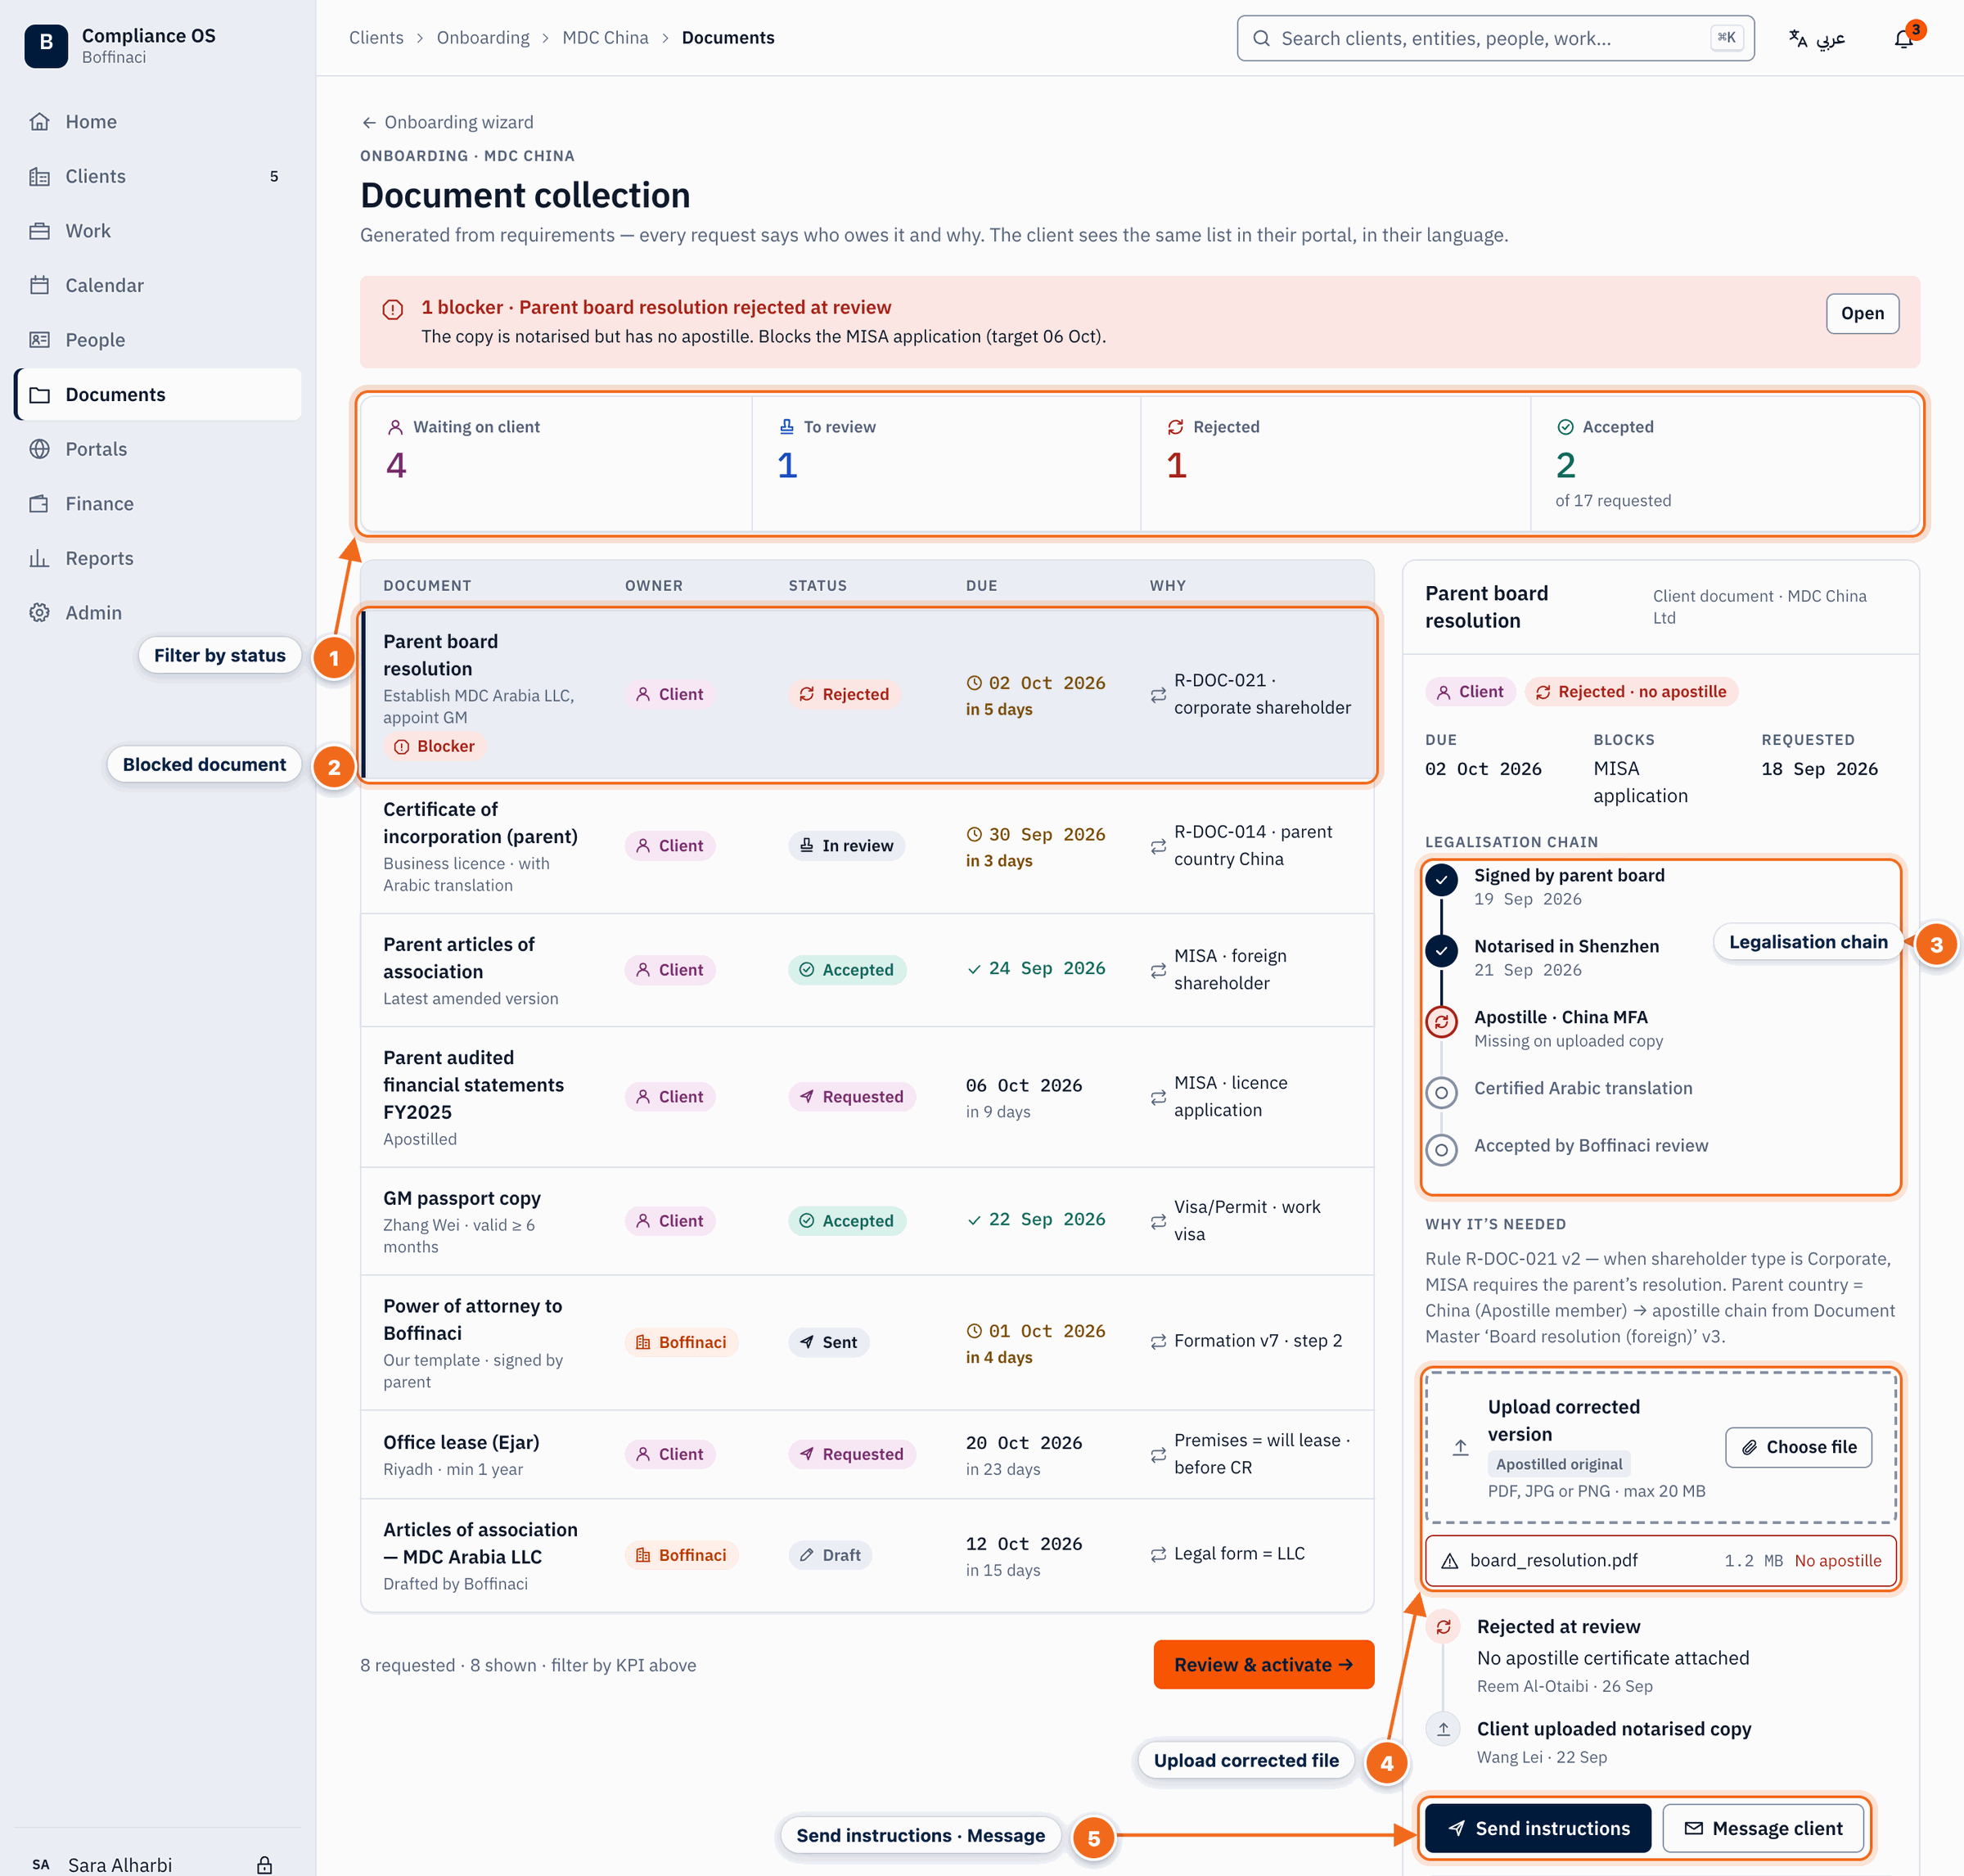
- Filter by status: Click a tile — waiting on client, to review, rejected, accepted — to filter the document list.
- Blocked document: Each row shows the document, who owes it, its status, due date and the rule that requires it; a Blocker tag marks documents that stop activation.
- Legalisation chain: The detail panel shows each legalisation step (signed, notarised, apostille, translation, review) and which step failed.
- Upload corrected file: Upload a new version on the client's behalf, or check the file that was rejected.
- Send instructions · Message: Send instructions emails the client step-by-step guidance for this document; Message client opens an email to them.
2. Send instructions
Select a document and click Send instructions. Choose the recipients, check the English and Arabic preview, and send.
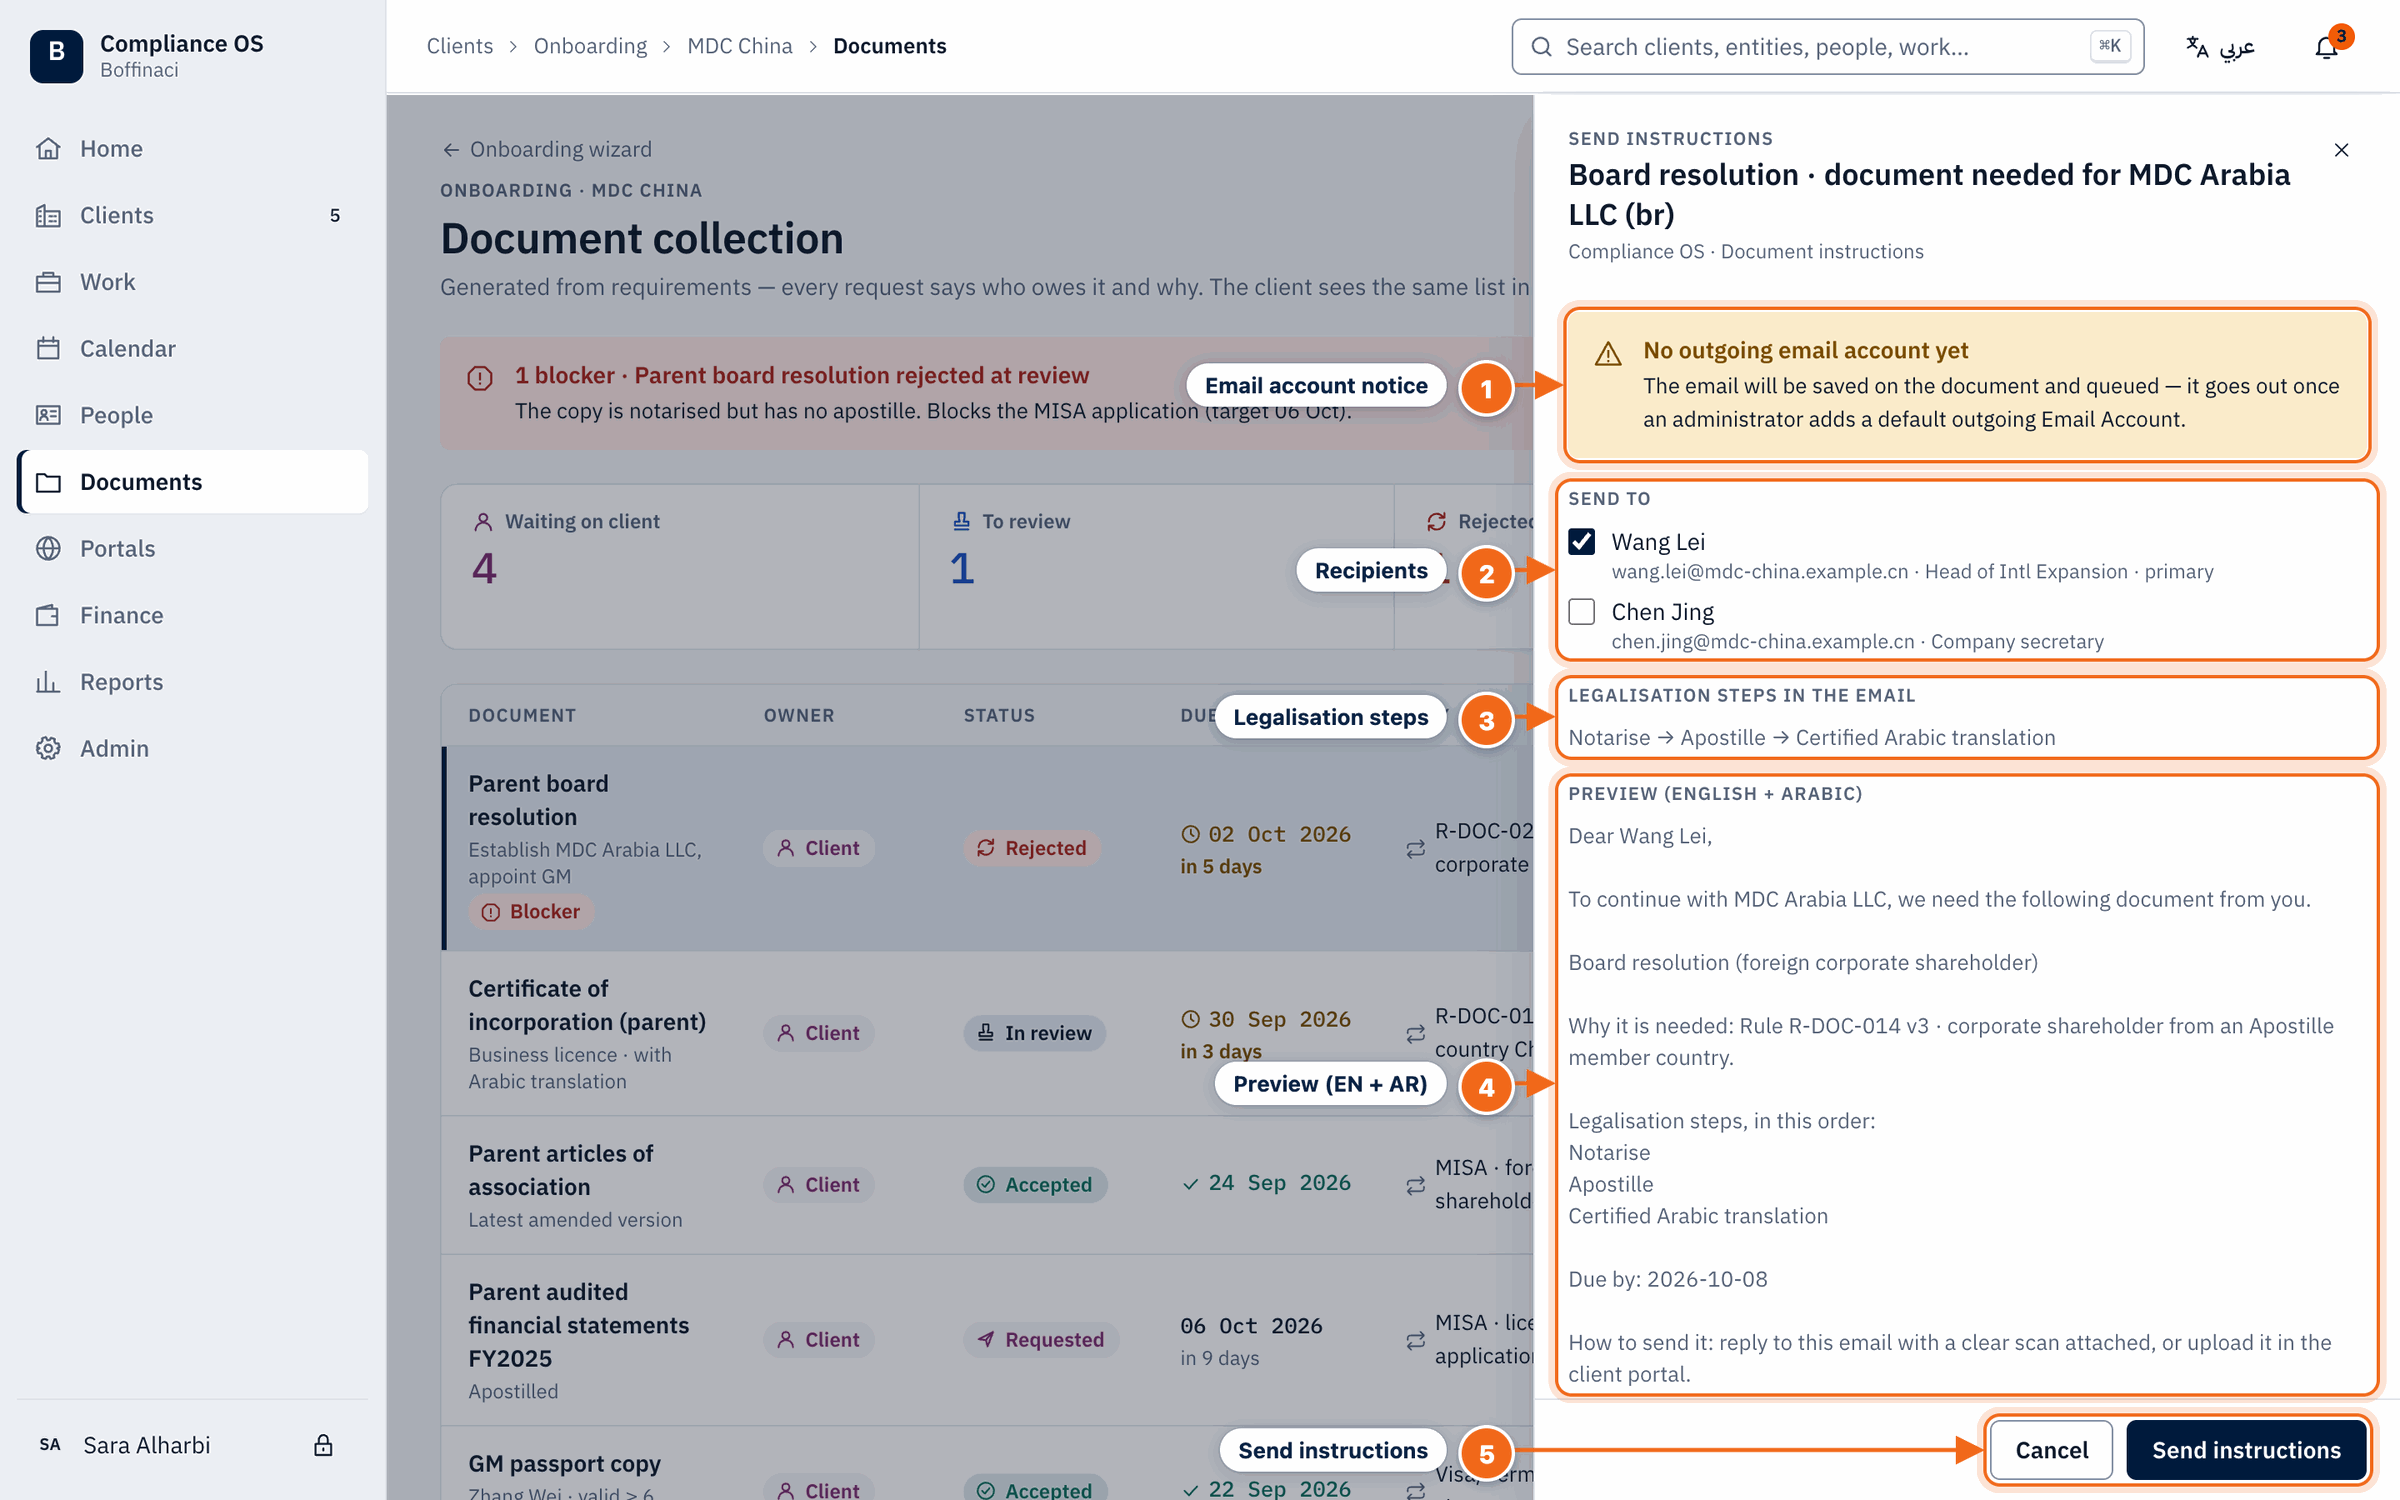
- Email account notice: If no outgoing email account is set up yet, the email is saved and queued until an administrator adds one.
- Recipients: Tick the client contacts who should receive the instructions; the primary contact is listed first.
- Legalisation steps: The legalisation steps included in the email, in the order the client must follow them.
- Preview (EN + AR): Check exactly what the client will receive, in English and Arabic, including why the document is needed and the due date.
- Send instructions: Send instructions sends (or queues) the email and logs it on the document's timeline.
3. Upload a received file
If the client emails the file to you, upload it on their behalf from the detail panel.
4. Review it
Check it against the review checklist. Click Accept document, or Reject with a reason. The client sees the reason and is asked for a corrected copy.
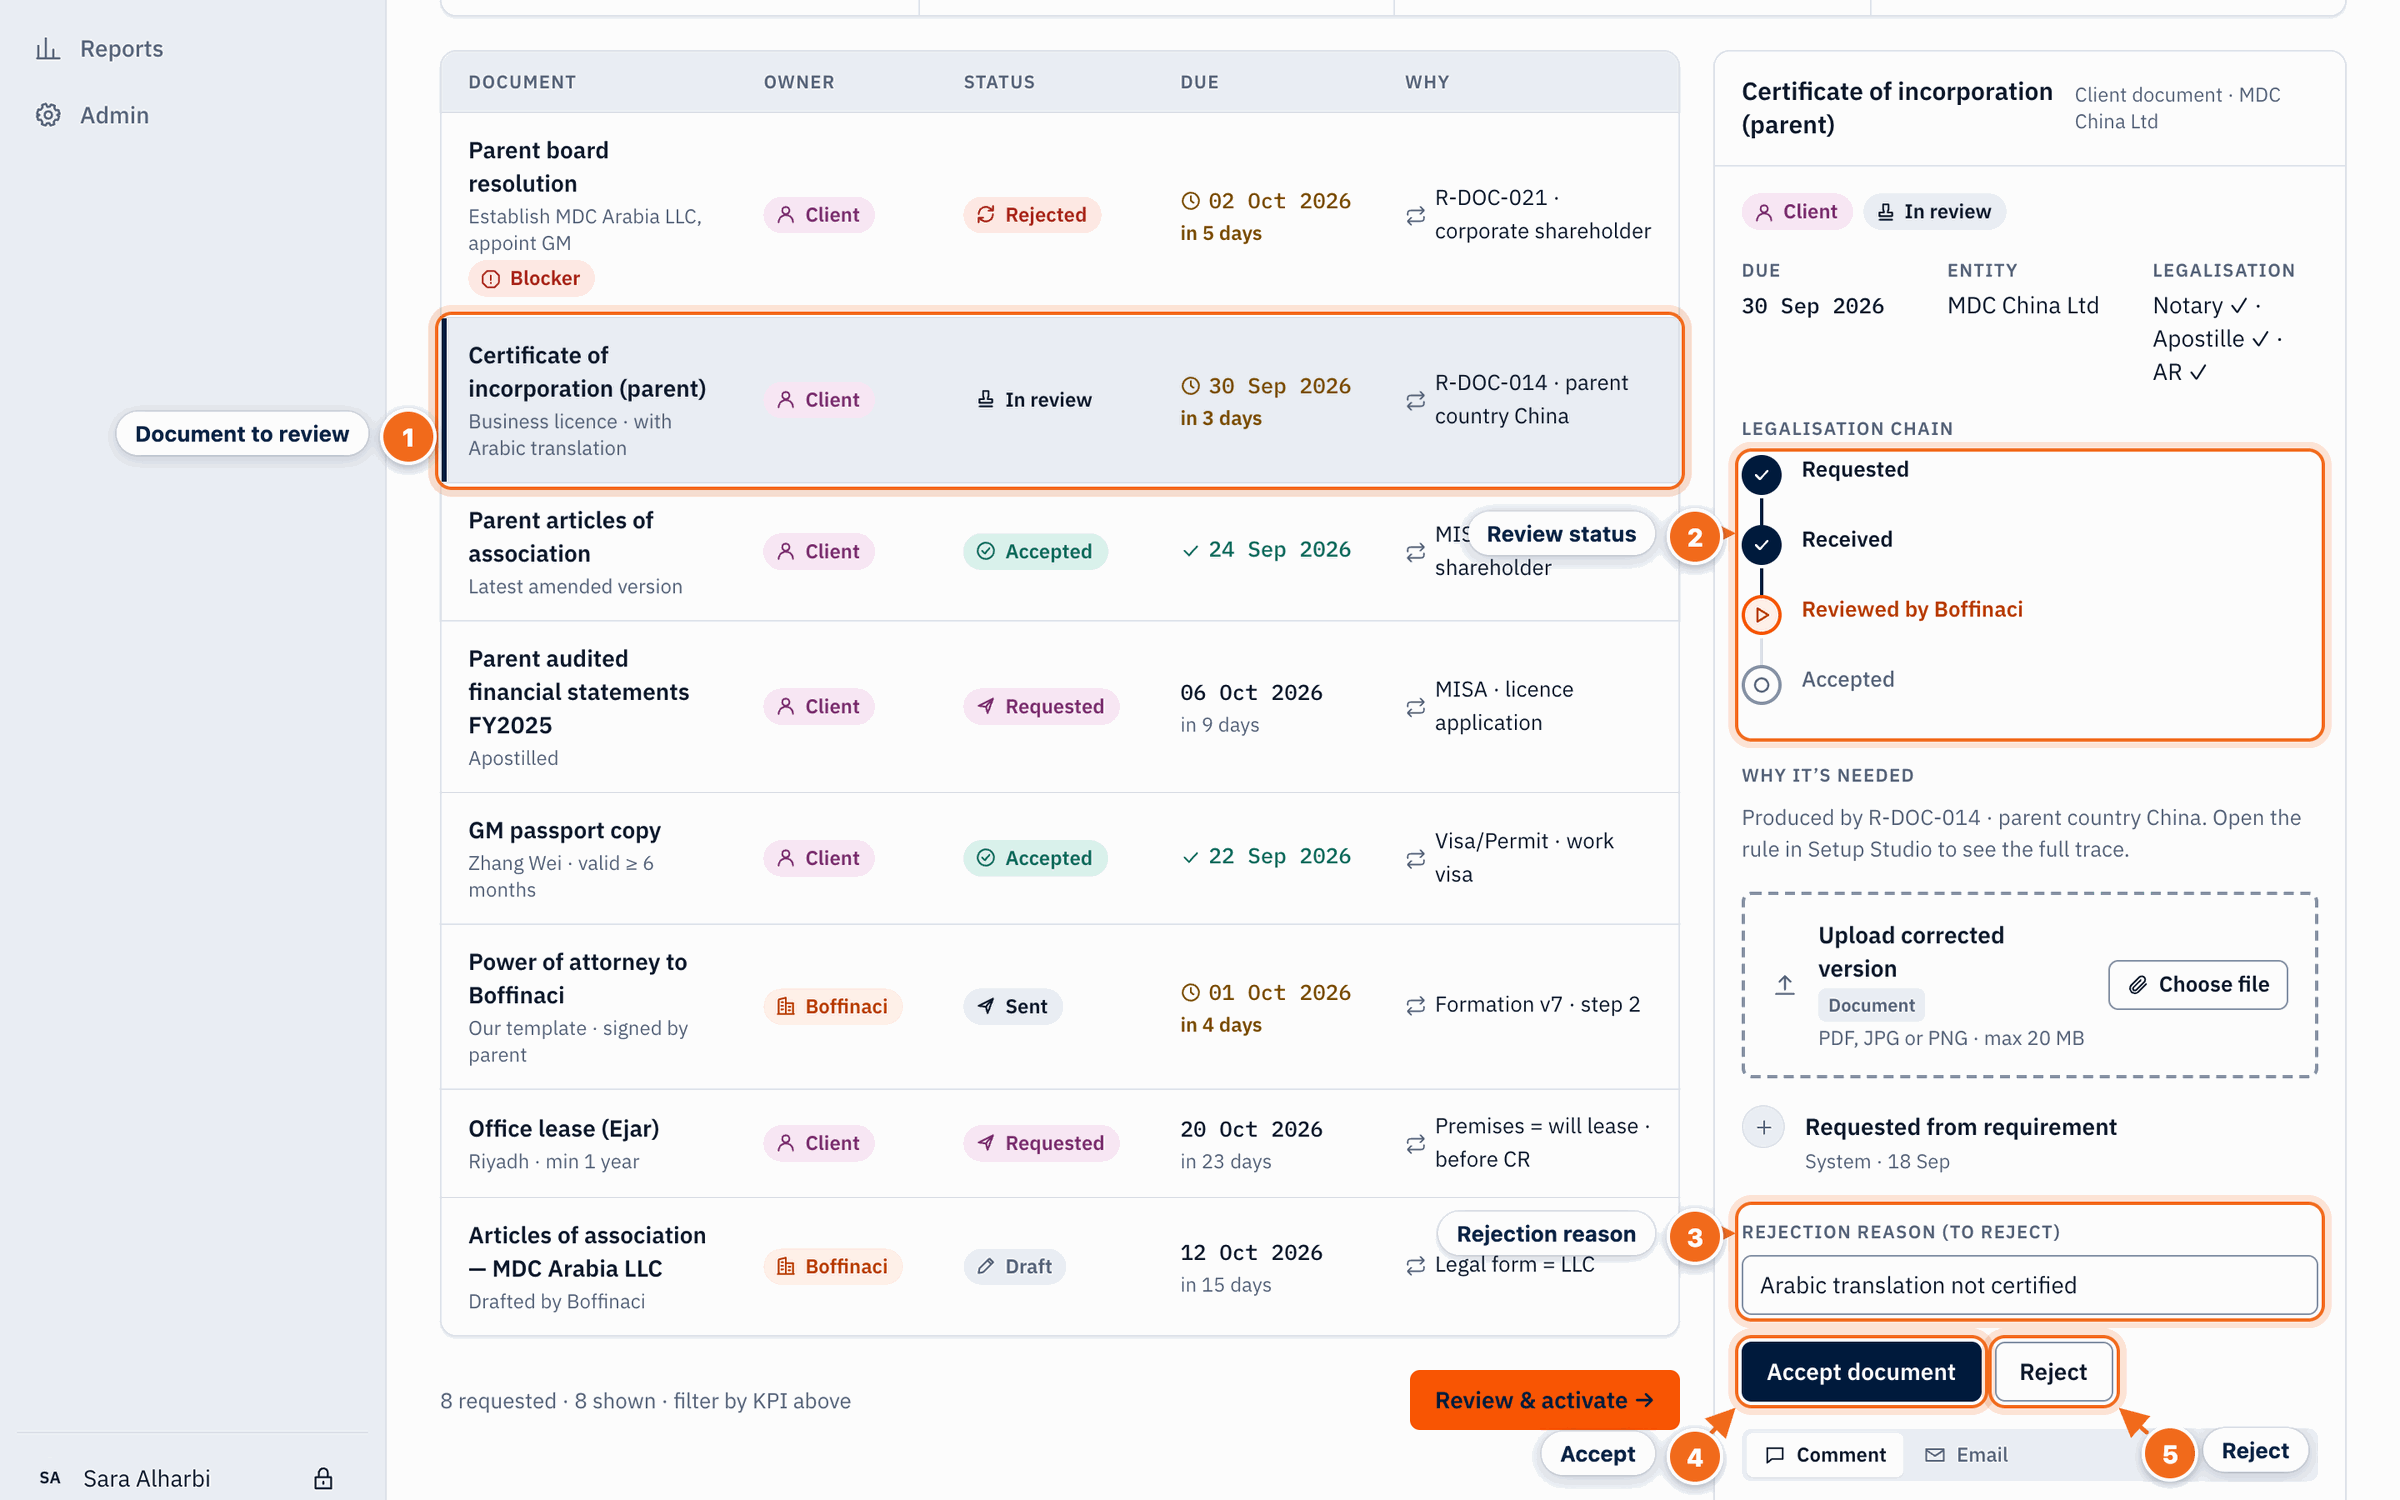
- Document to review: Select a document with status In review; its details open in the panel on the right.
- Review status: Check the legalisation details and where the document is in its chain (requested, received, reviewed, accepted).
- Rejection reason: If the document is not acceptable, type the reason — it is required for a rejection and is shown to the client.
- Accept: Accepts the document as evidence; the requirement is marked complete.
- Reject: Rejects the document with your reason; the client is asked for a corrected version.
5. See documents across all clients
The Documents section lists every client document. Click a row to open it in its onboarding.
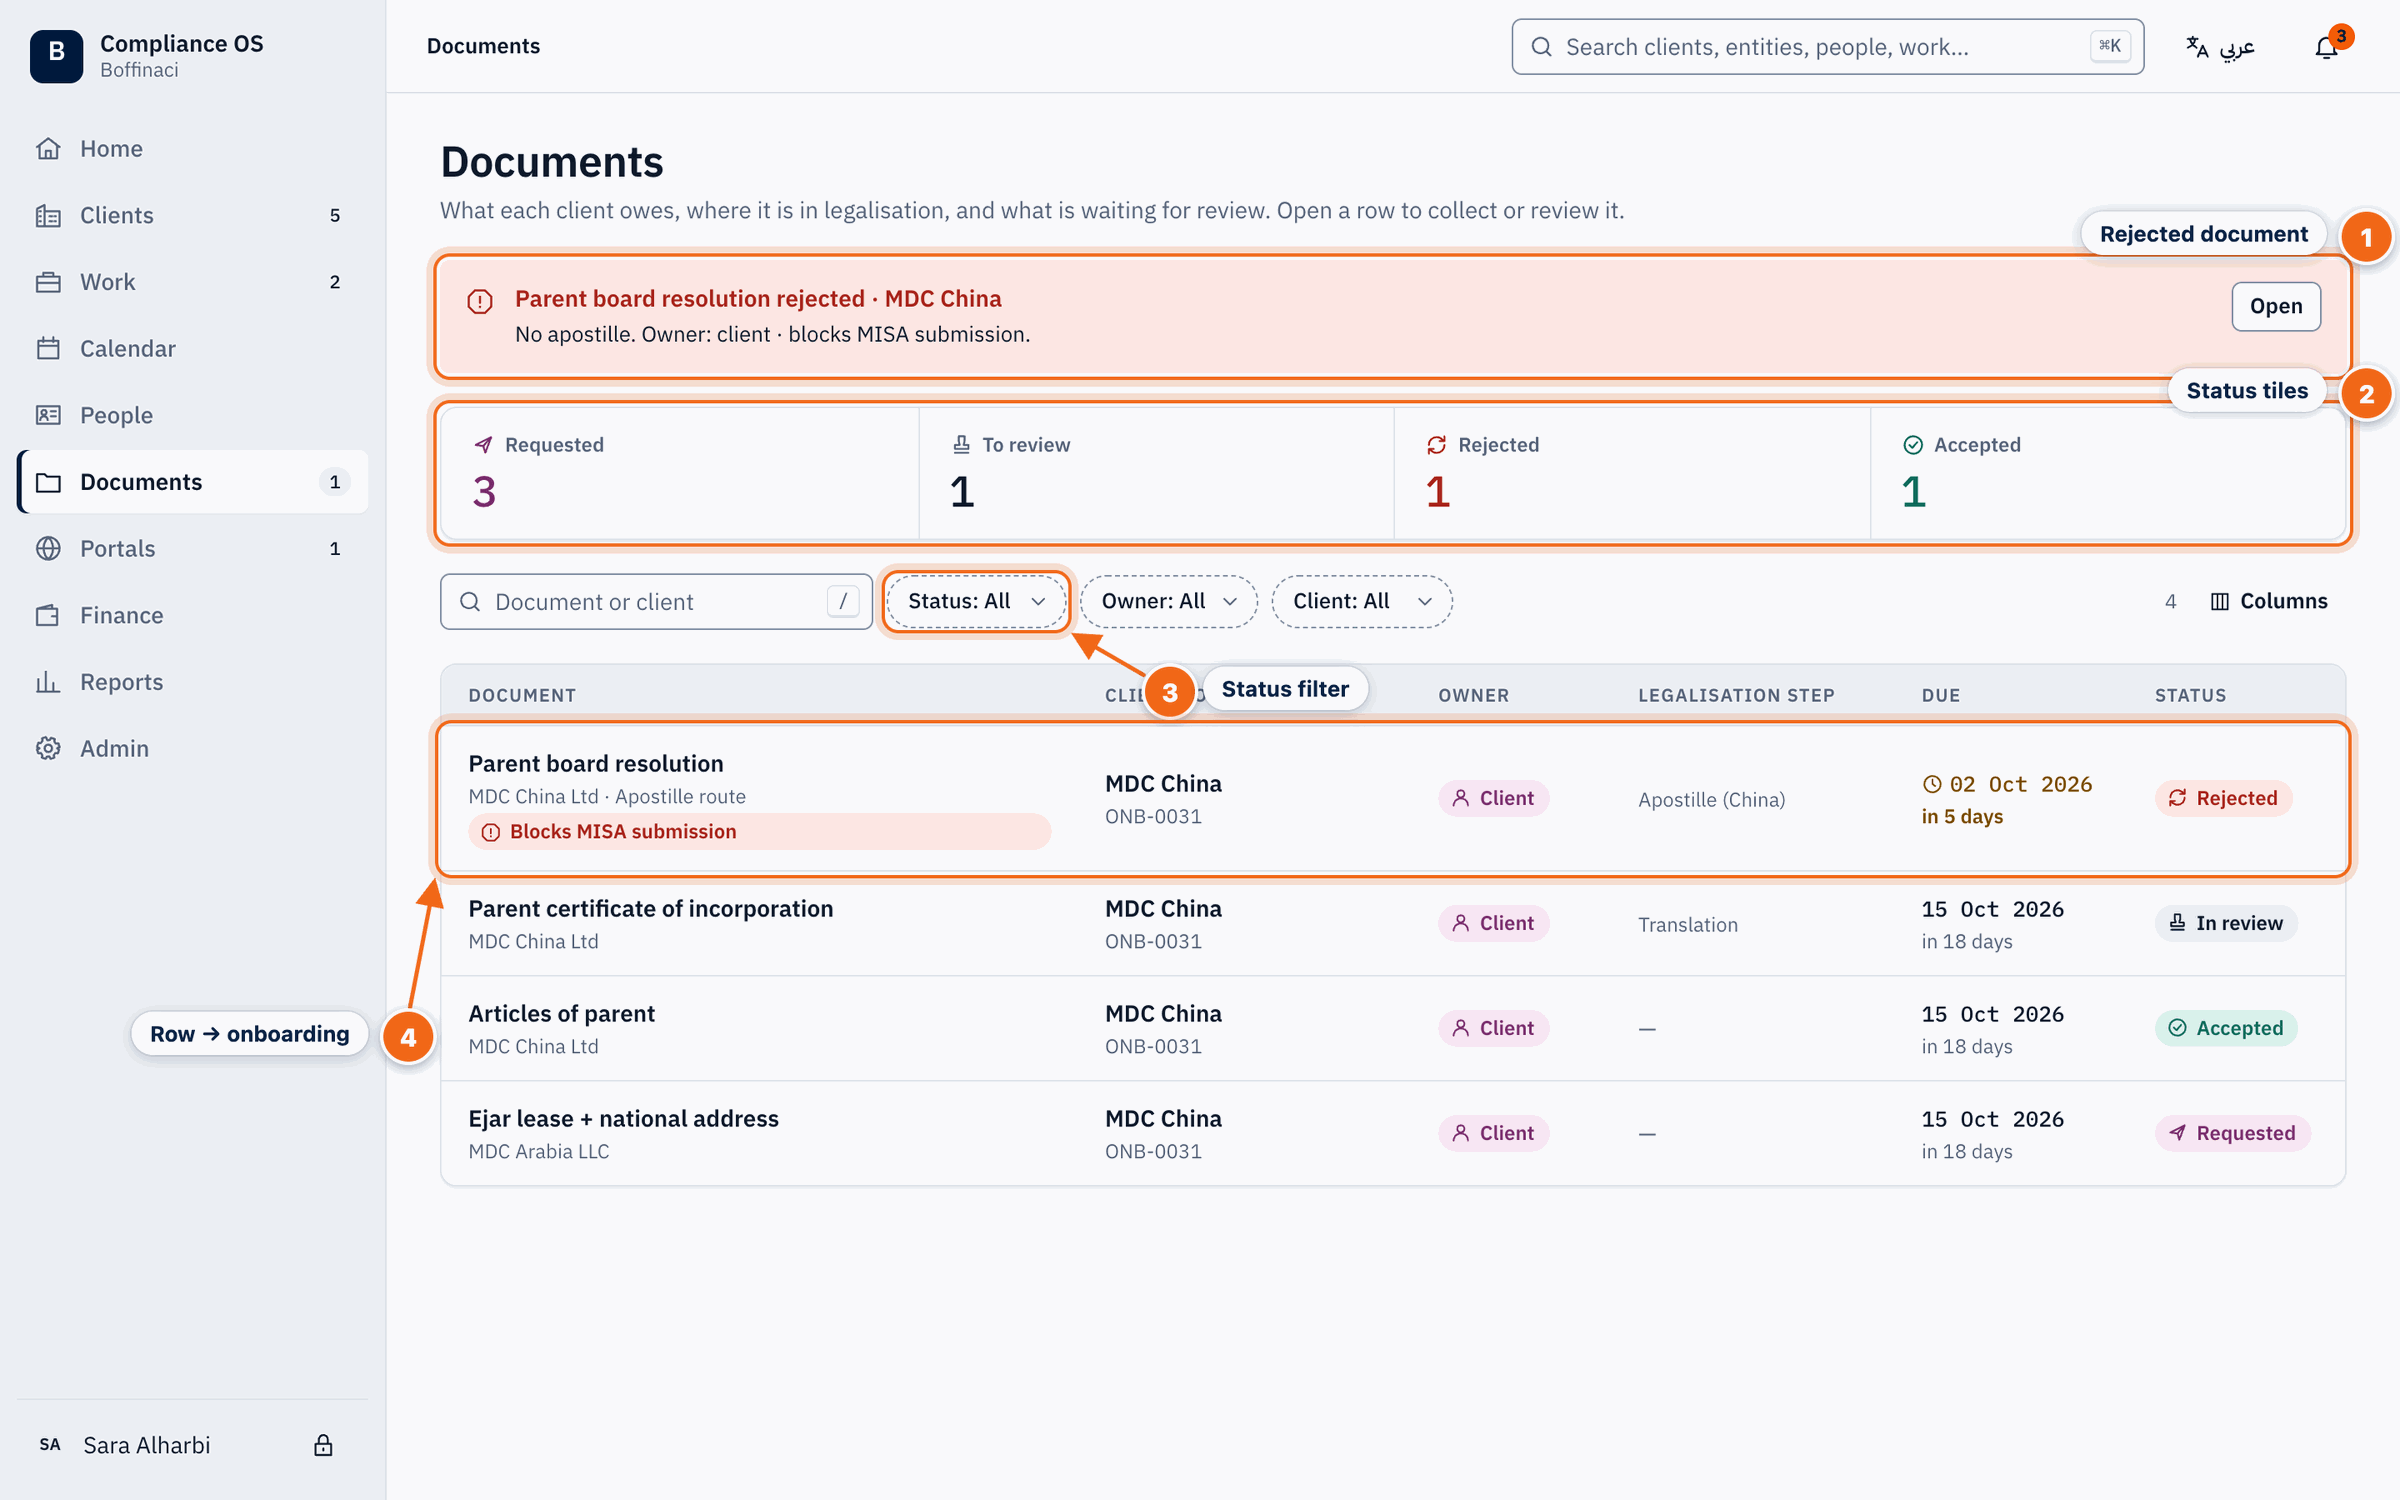
- Rejected document: Rejected or blocking documents across all clients are shown at the top; Open goes straight to them.
- Status tiles: Requested, to review, rejected and accepted counts; click a tile to filter.
- Status filter: Filter by status, owner or client, or search by document or client name.
- Row → onboarding: Click a document row to open it in that client's onboarding document collection.
Next: Activate a customer
Was this article helpful?
No comments yet. Login to start a new discussion Start a new discussion