Users and access
By Compliance OS on September 29, 2026
IntermediateInvite your team, give them roles and keep sign-in secure.
Before you start: you need the Tenant Admin or System Manager role.
1. See your users
Admin → Users shows every user's roles, status, authenticator app and last sign-in.
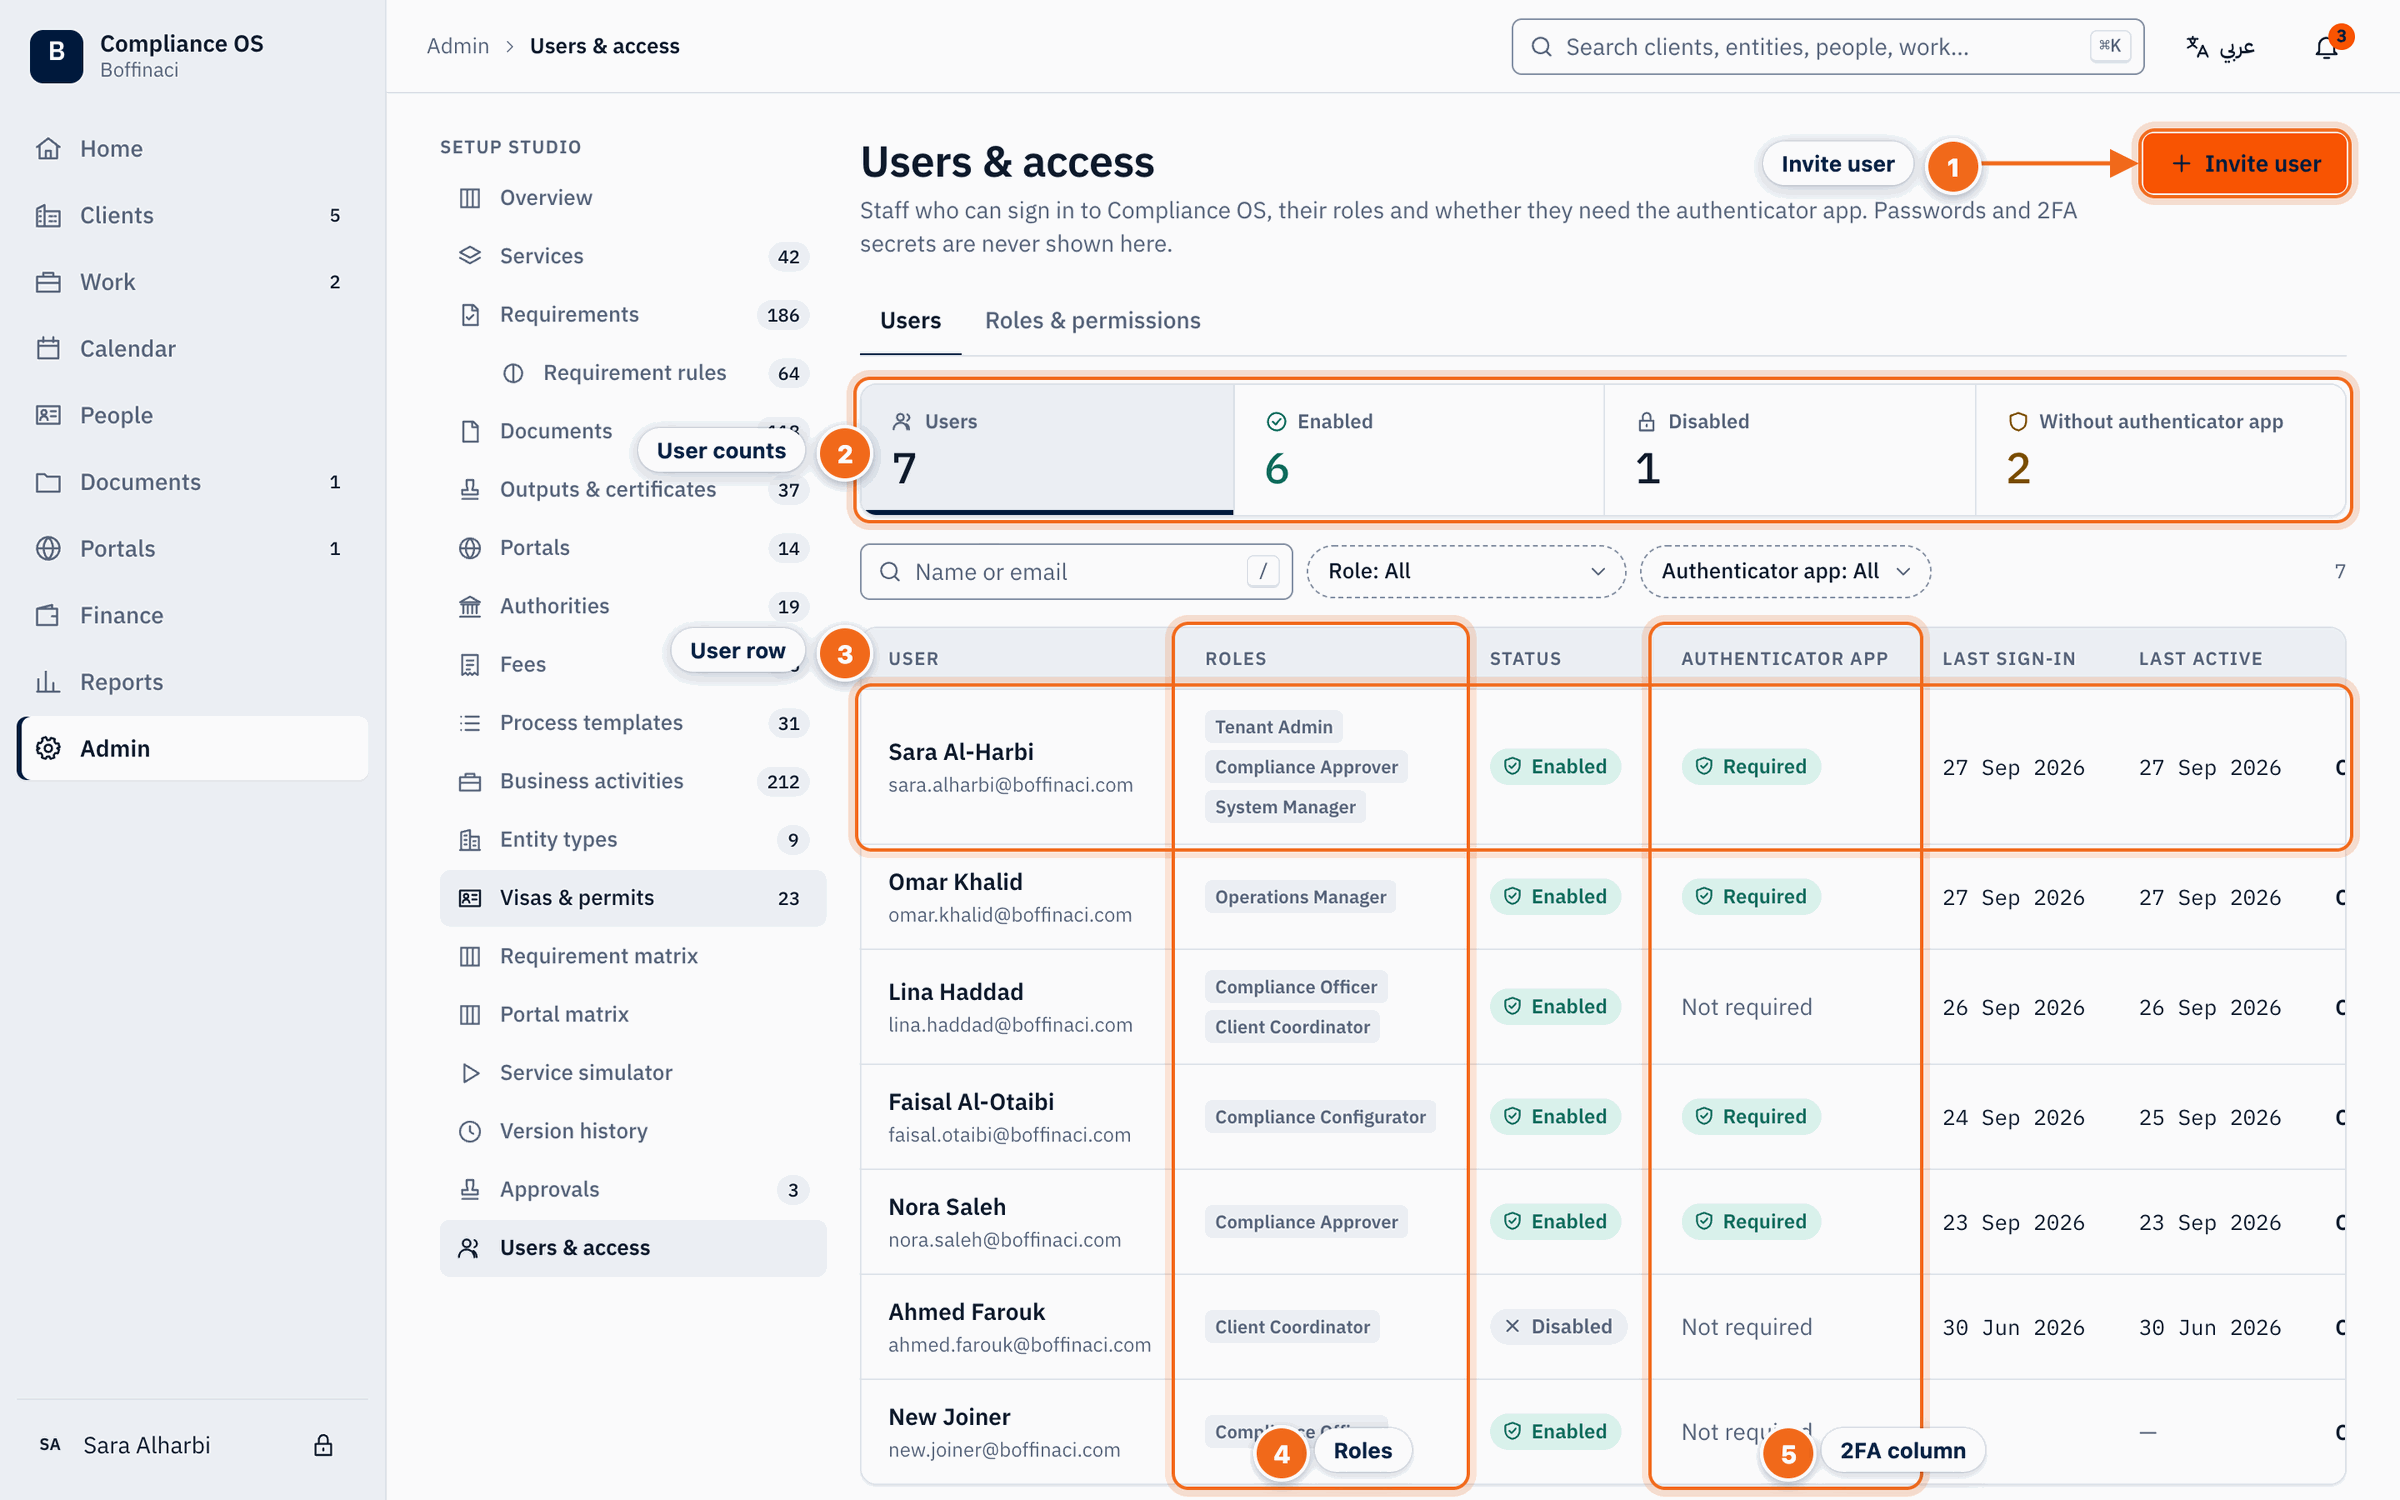
- Invite user: Invites a new staff user and sends them a welcome email.
- User counts: Total, enabled and disabled users, and how many sign in without an authenticator app.
- User row: Each user with their roles, status, authenticator app and last sign-in; click to open the user.
- Roles: The Compliance OS roles the user holds.
- 2FA column: Whether the user has the authenticator app (two-step verification) set up.
2. Invite a user
Click Invite user, enter their name and work email, tick their roles and send. They get a welcome email to set a password.
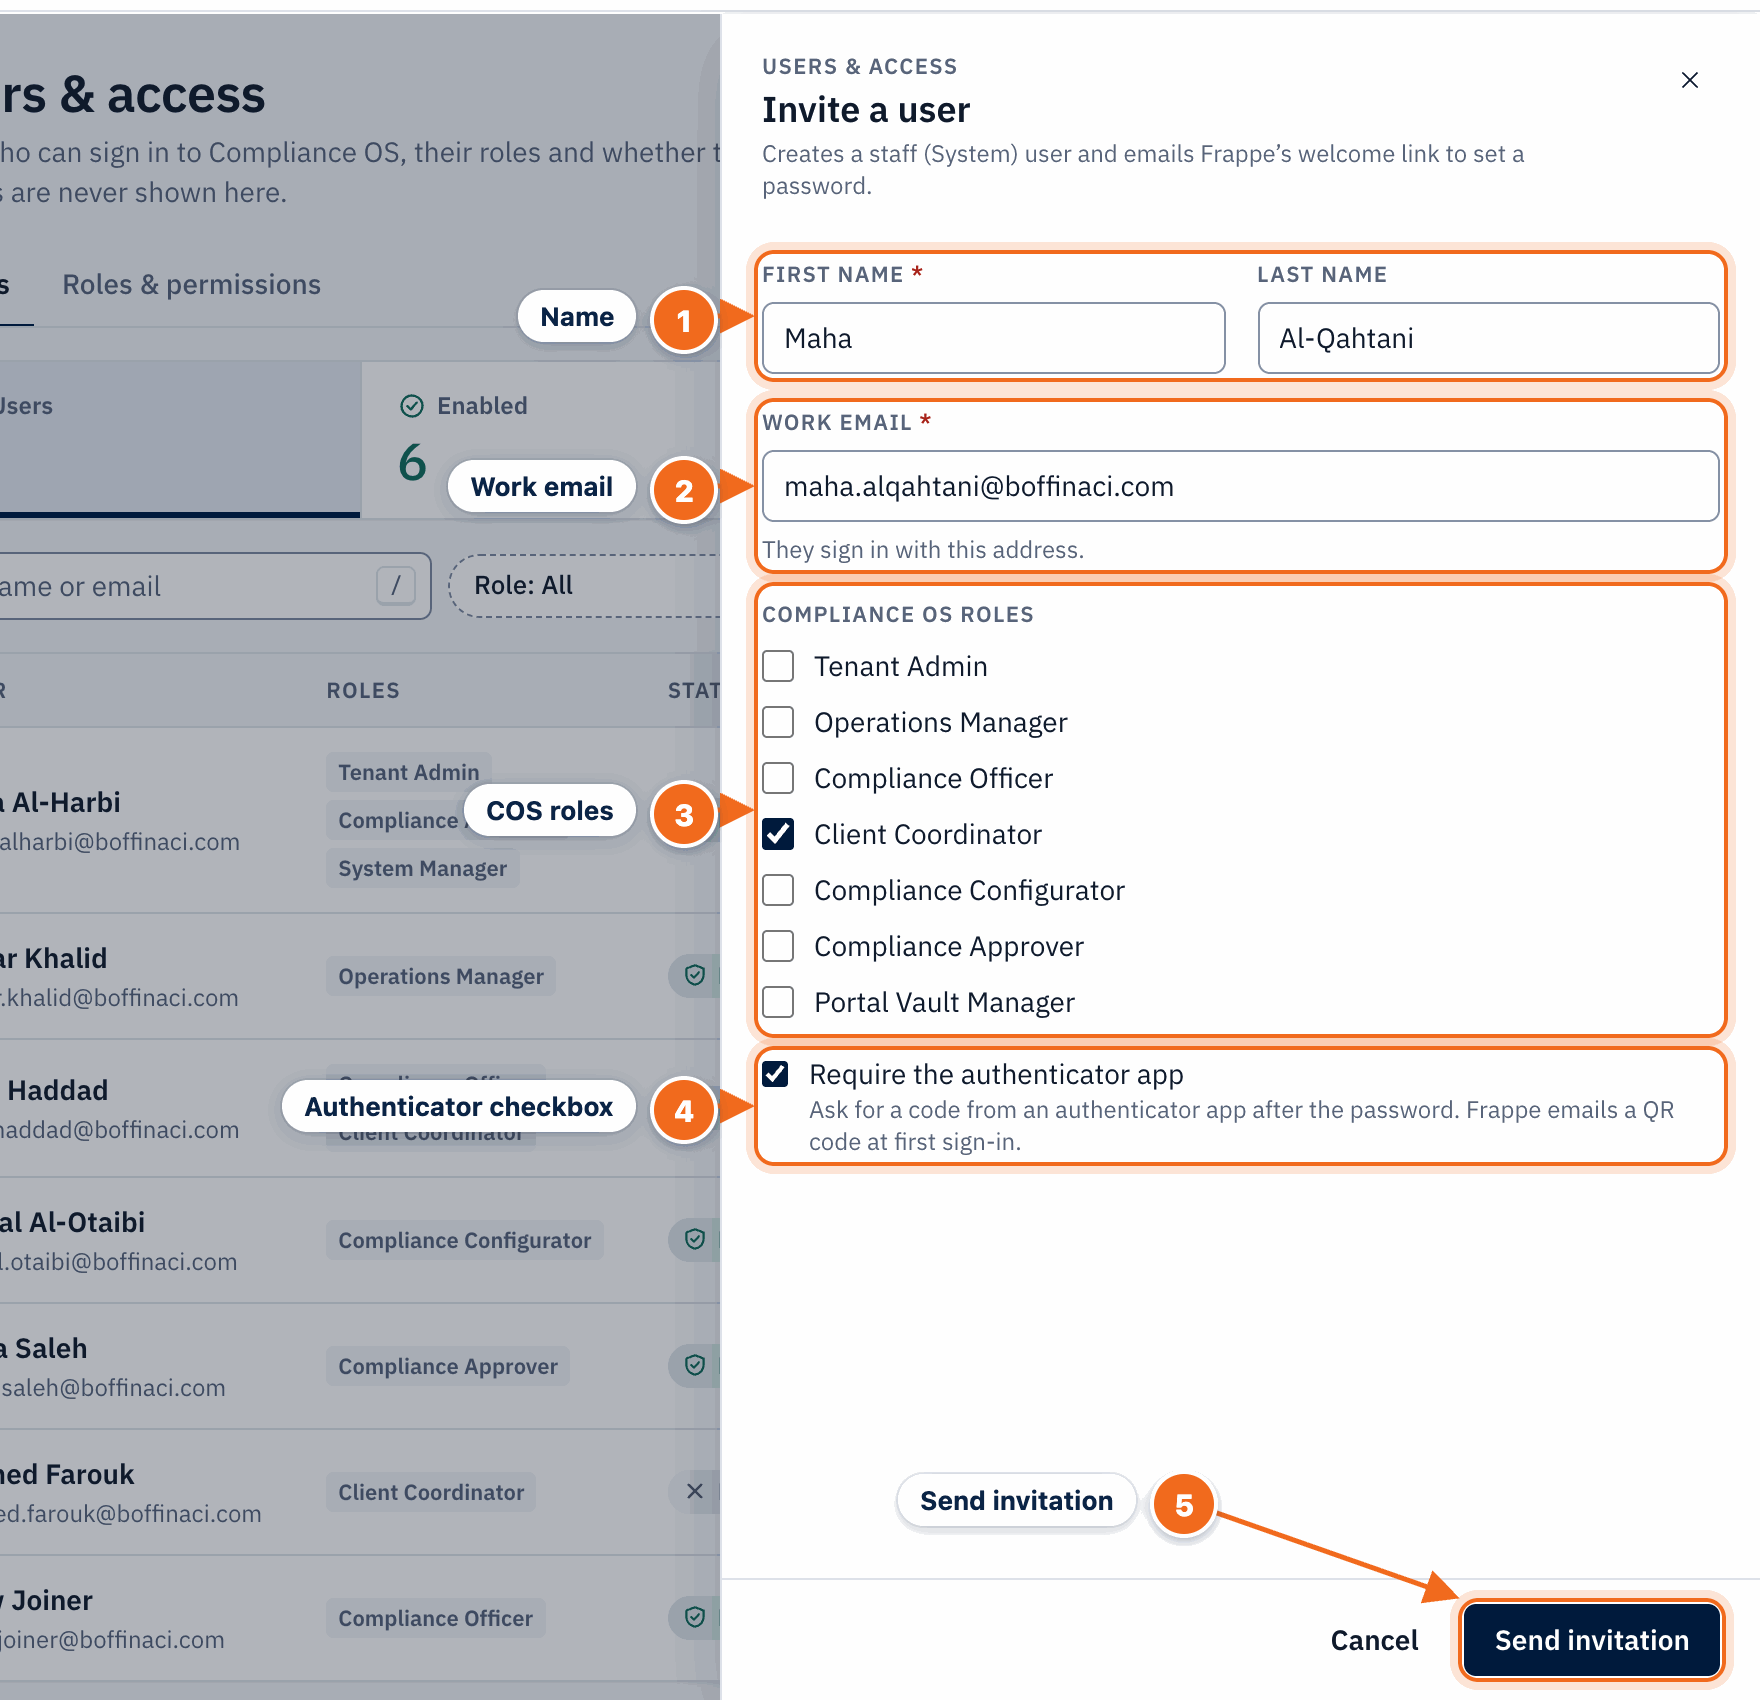
- Name: The new user's first and last name.
- Work email: The address they will sign in with; the welcome email goes here.
- COS roles: Tick the Compliance OS roles the user needs.
- Authenticator checkbox: Require two-step verification with an authenticator app from the first sign-in.
- Send invitation: Creates the user and sends the welcome email with a link to set a password.
3. Manage a user
Change roles, require the authenticator app, disable the account, send a password reset or sign them out everywhere.
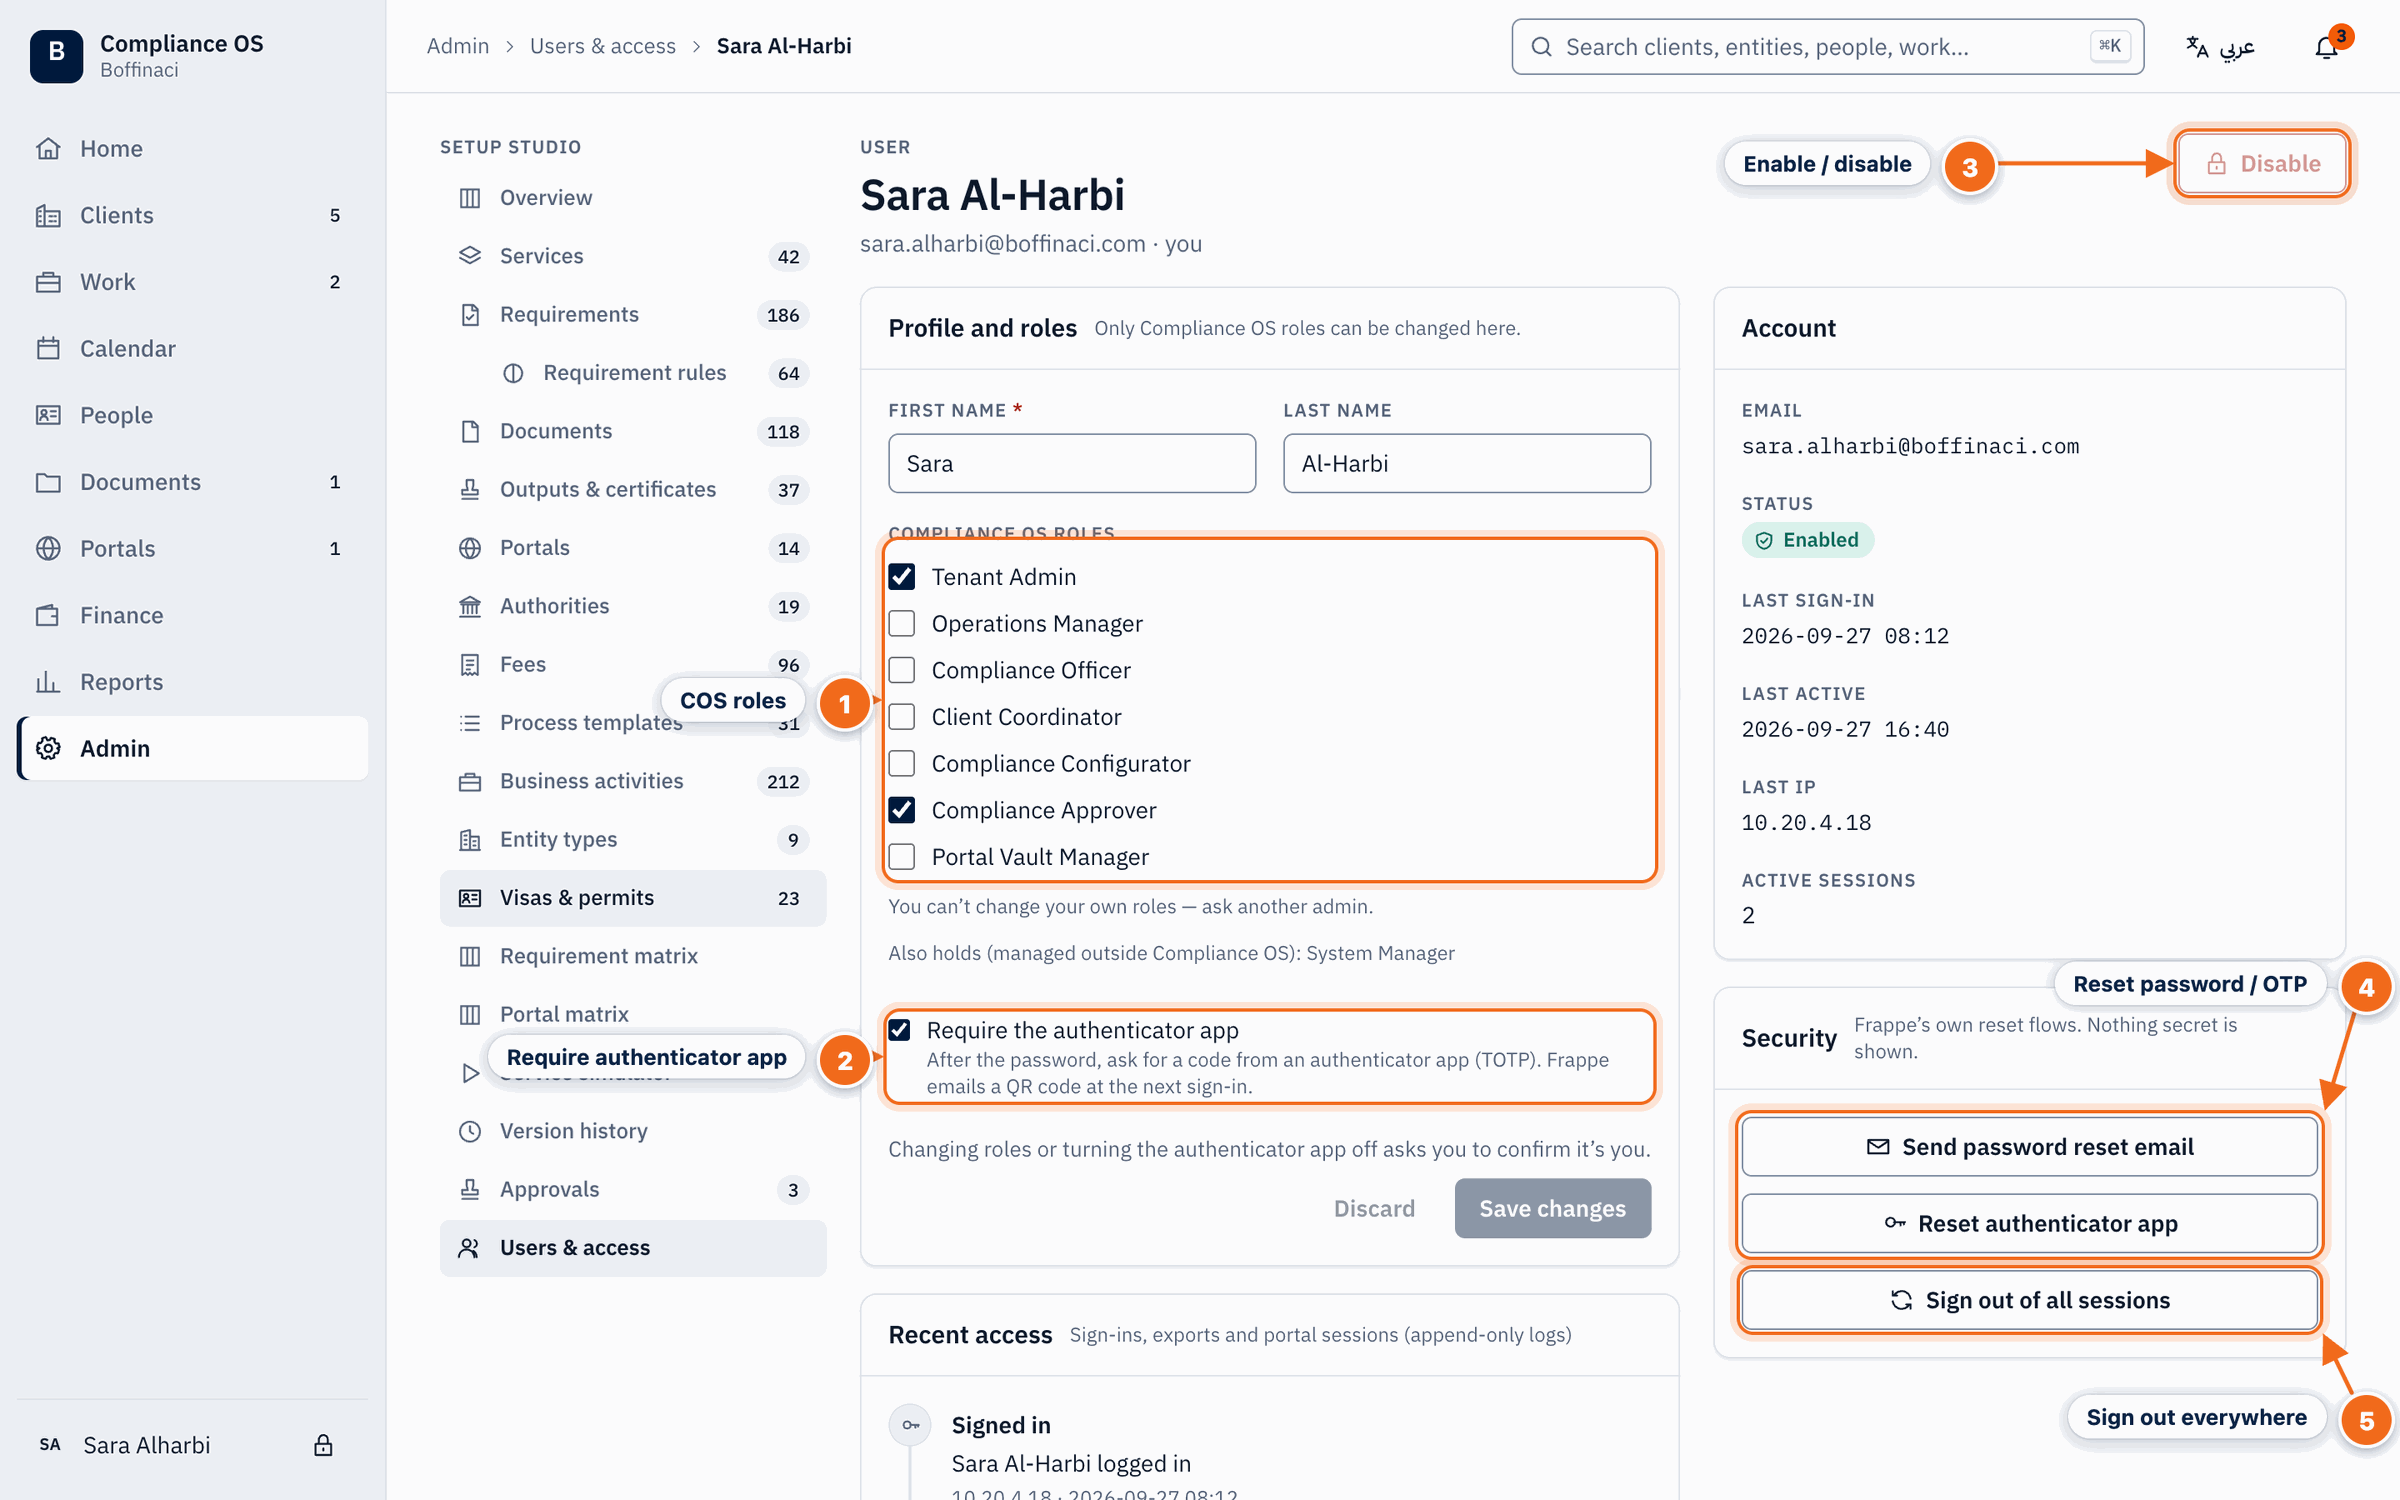
- COS roles: Tick the Compliance OS roles this user should have, then Save changes.
- Require authenticator app: Forces two-step verification with an authenticator app after the password.
- Enable / disable: Disables the account (or re-enables it); a disabled user cannot sign in.
- Reset password / OTP: Send a password reset email or reset the authenticator app. Nothing secret is shown to you.
- Sign out everywhere: Ends every active session for this user on all devices.
4. Check what roles can do
The role matrix shows what each role can do on each type of record.
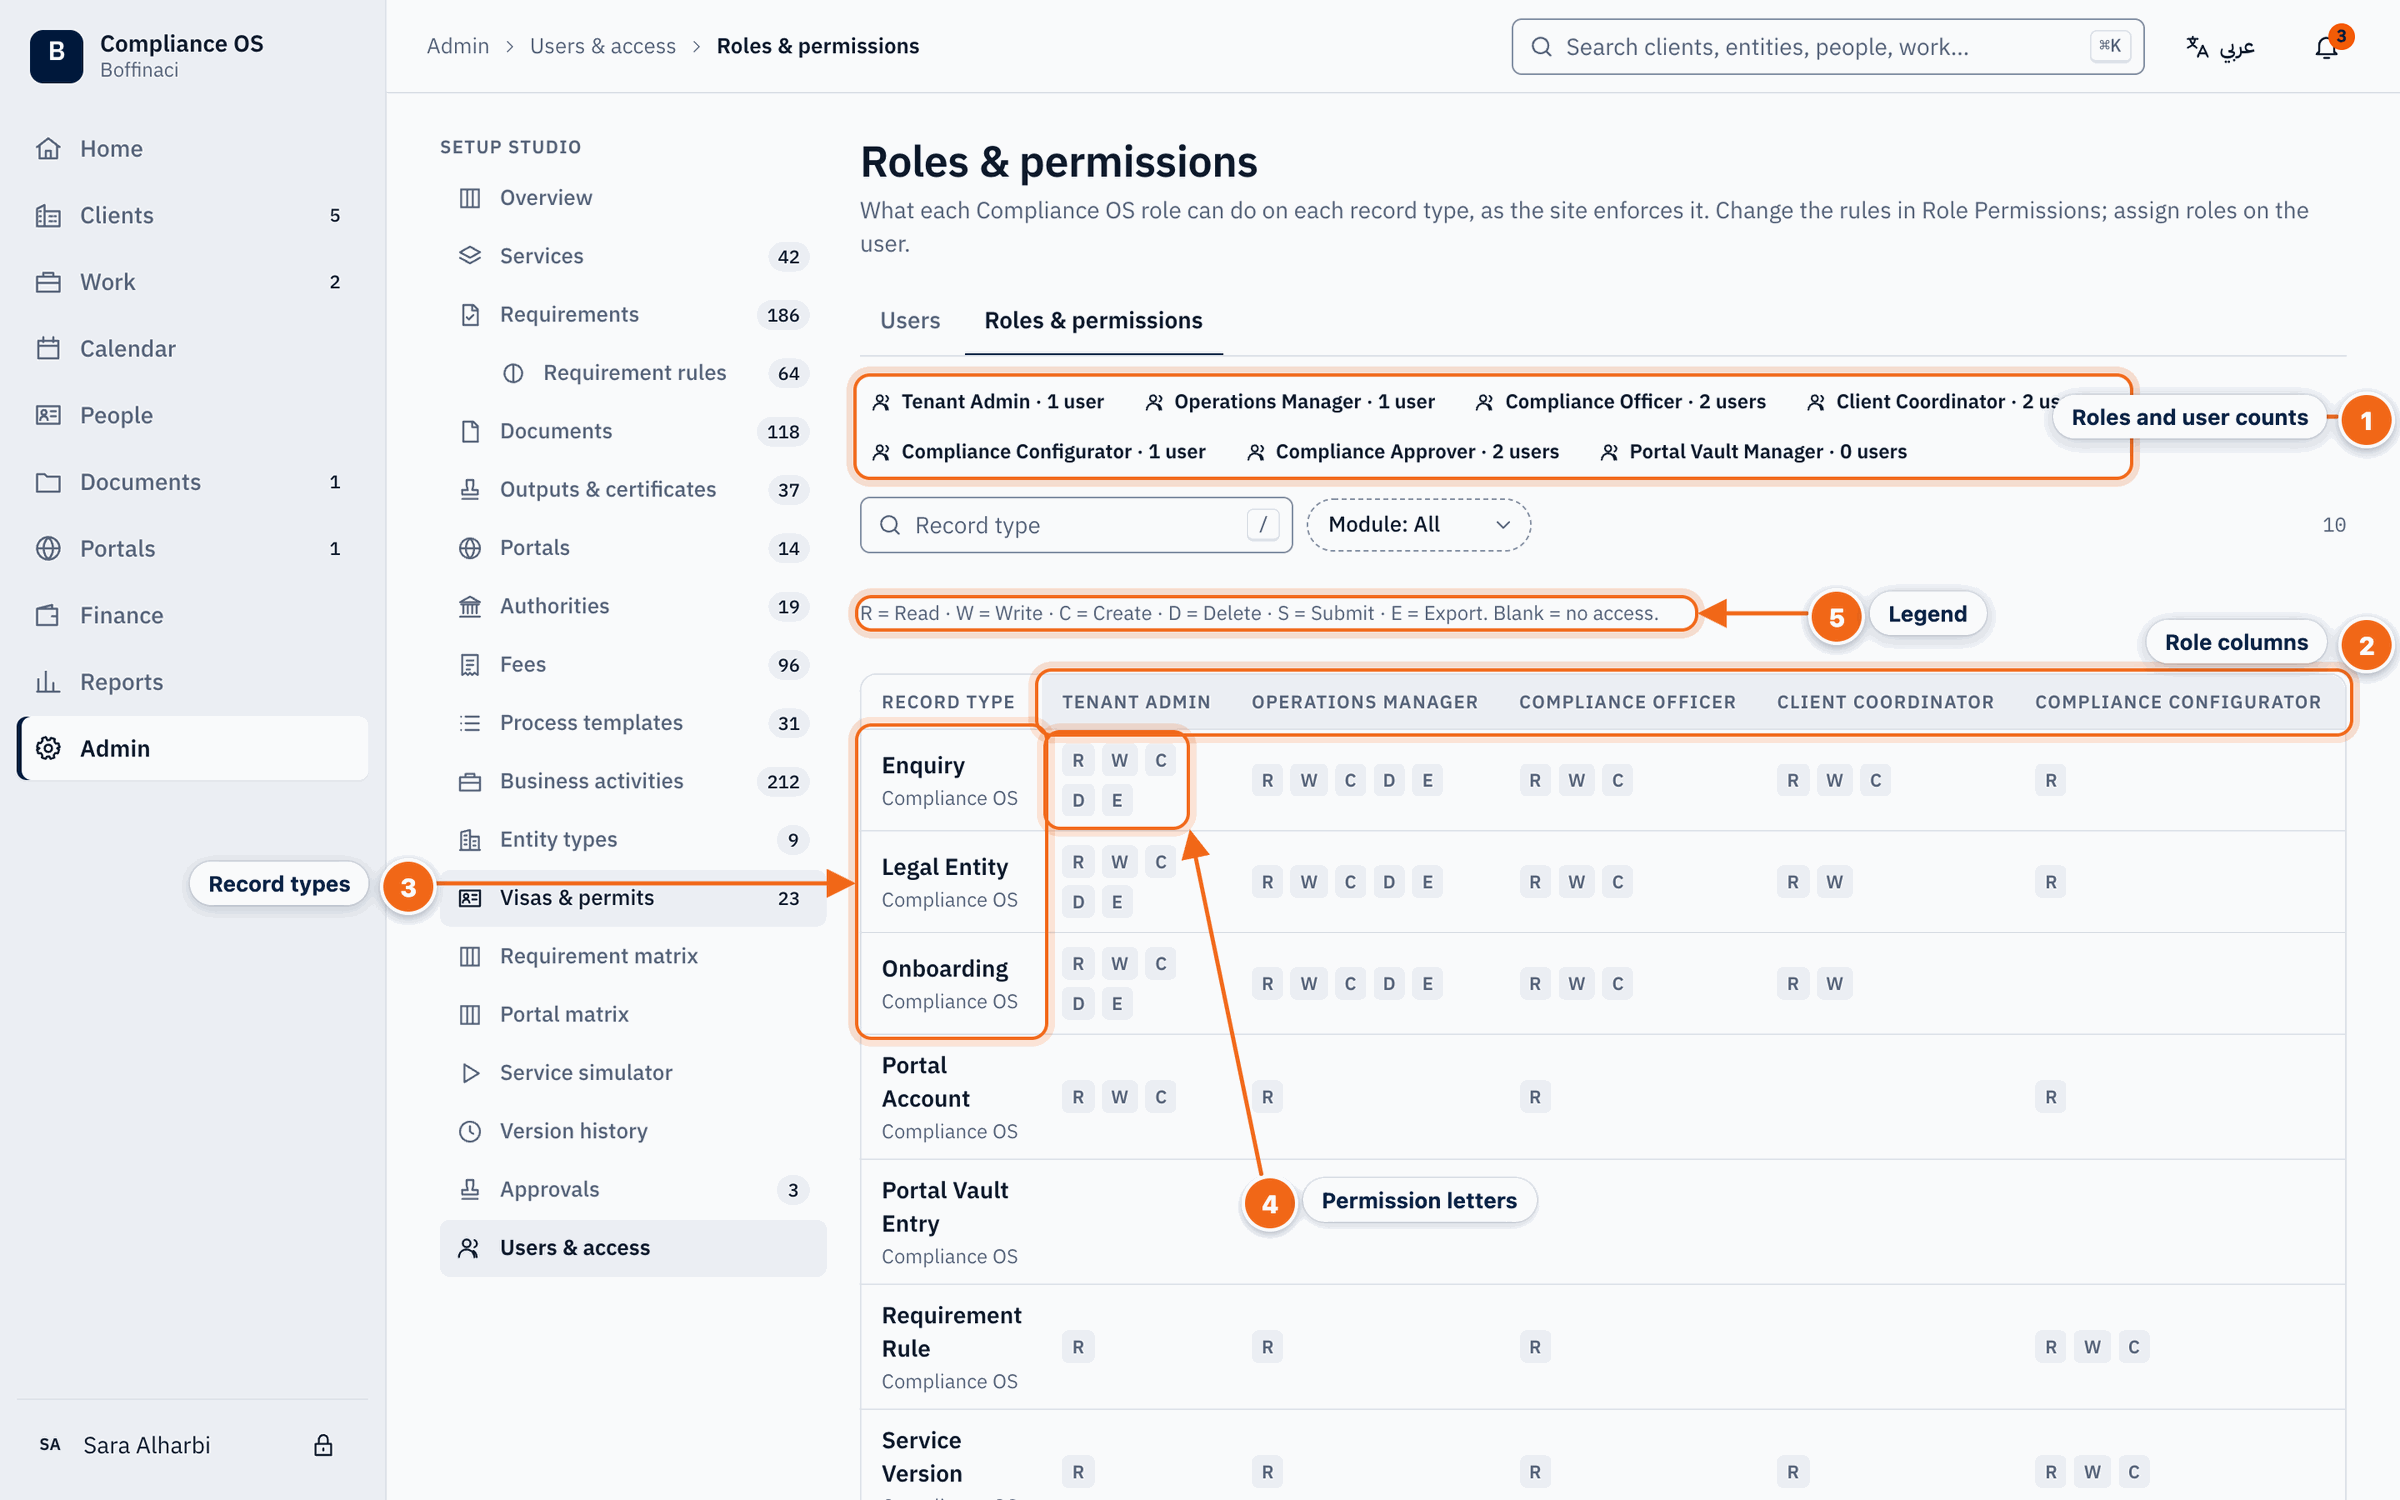
- Roles and user counts: Each Compliance OS role and how many users hold it.
- Role columns: One column per role; scroll sideways to see all seven.
- Record types: One row per record type (enquiry, legal entity, onboarding, portal account…).
- Permission letters: What the role can do on that record type — Read, Write, Create, Delete, Submit, Export; blank means no access.
- Legend: Explains the permission letters.
Was this article helpful?
No comments yet. Login to start a new discussion Start a new discussion